Vane Pump Repair and Overhaul Techniques: Complete Technical Guide
Vane Pump Repair and Overhaul Techniques: Complete Technical Guide
This in?depth guide covers professional vane pump repair and overhaul techniques
for industrial and mobile hydraulic applications. It is written for maintenance engineers,
reliability managers, workshop technicians, and anyone responsible for
troubleshooting, rebuilding, and servicing vane pumps.
1. Introduction to Vane Pump Repair and Overhaul
Vane pumps are widely used in hydraulic power units, machine tools, plastics machinery,
automotive test benches, marine systems, and general industrial equipment. Their compact
design, low noise level, and relatively high volumetric efficiency make them essential
in many pressure and flow control applications.
Because vane pumps operate under continuous load and often in contaminated or demanding
environments, vane pump repair and overhaul is a routine task in many plants.
A structured repair process increases pump reliability, extends component life, and
reduces total cost of ownership. This page focuses on:
- Common vane pump failures and root causes
- Step?by?step vane pump disassembly and inspection
- Reconditioning and replacement criteria
- Reassembly, testing, and performance validation
- Preventive maintenance and reliability improvements
2. Vane Pump Basics and Operating Principle
2.1 What is a Vane Pump?
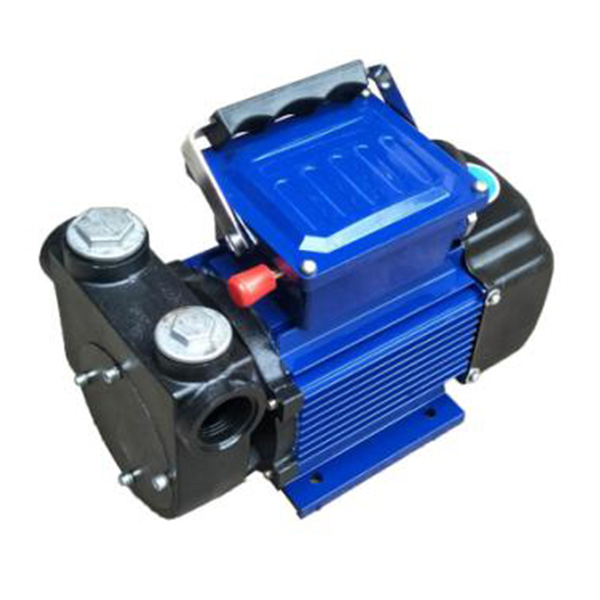
A vane pump is a positive displacement rotary pump in which sliding vanes move in and out
of a rotor that is eccentrically mounted in a cam ring. As the rotor turns, the vanes
create chambers of varying volume, causing liquid to be drawn in at the inlet and forced
out at the outlet. Vane pumps are used in both hydraulic power transmission and fluid
transfer applications.
2.2 Main Components of a Vane Pump
Understanding internal components is fundamental for effective
vane pump repair and overhaul. The table below lists core parts found in
most fixed and variable displacement vane pumps.
Key Vane Pump Components and Functions
Component |
Typical Material |
Main Function in Pump |
|---|
Housing / Pump Body |
Cast iron / Ductile iron / Steel |
Contains internal elements, provides structural strength, and defines flow paths. |
End Covers / Side Plates |
Hardened steel / Cast iron |
Close the pump assembly, provide sealing surfaces and lubrication channels. |
Cam Ring (Stator Ring) |
Hardened alloy steel |
Provides the eccentric profile that creates suction and discharge chambers. |
Rotor |
Case?hardened steel |
Holds vanes in radial slots and transfers torque from the drive shaft. |
Vanes |
Hardened steel / Composite |
Slide radially to maintain contact with the cam ring, forming pumping chambers. |
Shaft |
Alloy steel |
Connects pump to prime mover (motor/engine); transmits torque. |
Bearings |
Roller / Ball bearings |
Support the shaft and maintain alignment between rotor and housing. |
Seals (Shaft Seal, O?rings) |
Elastomers (NBR, FKM, HNBR, etc.) |
Prevent external leakage and separate high/low pressure zones. |
Port Plate / Valve Plate |
Hardened steel |
Directs fluid to and from rotor chambers via kidney ports. |
Compensator / Control Mechanism (Variable Vane) |
Steel / Cast iron |
Adjusts cam ring position to vary displacement and control flow/pressure. |
2.3 Operating Principle
During rotation the vanes slide outward due to centrifugal force and hydraulic pressure,
staying in contact with the cam ring. The eccentricity between the rotor and cam ring
causes a continuous change in chamber volume:
- As a chamber volume increases, a low?pressure region is formed, drawing fluid into the pump.
- As the chamber rotates to the contracting zone, volume decreases and fluid is forced out through the discharge port.
- Sealing between adjacent chambers is provided by close tolerances between the vanes, rotor, cam ring, and side plates.
Any wear or damage that disturbs this sealing or eccentric geometry directly reduces pump
efficiency and is a primary focus during vane pump overhaul.
3. Typical Applications of Vane Pumps
Vane pumps are used wherever reliable medium?pressure, low?noise hydraulic power is required.
Understanding the application helps define the repair scope, expected performance,
and required overhaul techniques.
Common Vane Pump Application Areas
Application Sector |
Typical System |
Operating Characteristics |
|---|
Industrial Hydraulics |
Machine tools, presses, injection molding machines |
Continuous duty, stable temperature, moderate contamination, low noise requirement. |
Mobile Equipment |
Lift trucks, construction machinery auxiliaries |
Variable speed, shock loads, fluctuating temperatures, higher contamination risk. |
Marine & Offshore |
Steering systems, deck machinery |
Corrosive environment, need for high reliability and robust sealing. |
Automotive & Testing |
Power steering, transmission test benches |
High cycling, tight control of flow and pressure, strict noise limits. |
Process & Utility |
Lube oil systems, fuel transfer, cooling circuits |
Medium pressure, continuous operation, focus on long service life. |
4. Advantages of Vane Pumps in Repairable Systems
Compared with other positive displacement pumps, vane pumps offer a series of advantages
that make vane pump repair and overhaul economically attractive:
- Good volumetric efficiency across a wide speed range.
- Low noise and low pulsation compared to gear pumps.
- Compact design and relatively simple internal geometry.
- Modular construction, which simplifies replacement of cartridges, seals, and wear parts.
- Field-serviceable with standard workshop tools and equipment.
- Multi?chamber or double?pump options for combined flow requirements.
- Variable displacement options for energy?efficient hydraulic systems.
Because of these features, refurbishment, cartridge replacement, and
vane pump overhaul procedures are standard practices in many maintenance
programs instead of complete pump replacement.
5. Typical Vane Pump Performance Specifications
While each manufacturer publishes specific data, most industrial hydraulic vane pumps fall
into characteristic operating ranges. These ranges are essential when verifying performance
after a vane pump repair or complete overhaul.
Typical Hydraulic Vane Pump Specification Ranges
Parameter |
Typical Range |
Notes |
|---|
Displacement |
5–250 cm3/rev (0.3–15 in3/rev) |
Smaller for compact equipment; larger for central power units. |
Continuous Pressure |
70–210 bar (1000–3000 psi) |
Some special designs up to ~250 bar (3600 psi). |
Peak Intermittent Pressure |
Up to 240 bar (3500 psi) |
Short duration only; check datasheet during overhaul planning. |
Speed Range |
600–3000 rpm (typical) |
Minimum speed depends on viscosity and inlet conditions. |
Fluid Viscosity |
10–100 cSt (recommended) |
High viscosity at cold start may cause noise and cavitation. |
Fluid Temperature |
-20 to +80 °C (approx.) |
Limited by seal and fluid type; verify for each installation. |
Filtration Level |
ISO 4406 18/16/13 or better |
Cleanliness level critical for long vane and cam ring life. |
Noise Level |
Typically 60–75 dB(A) at 1 m |
Depends on size, speed, pressure, and mounting conditions. |
6. Common Vane Pump Failures and Symptoms
Thorough understanding of failure modes is vital for effective
vane pump troubleshooting, repair, and overhaul. Most hydraulic vane pump
problems can be grouped into several categories.
6.1 Hydraulic and Mechanical Symptoms
- Loss of flow or reduced output at rated speed and pressure.
- Excessive noise, whining, or rattling during operation.
- Pressure fluctuations and unstable system behavior.
- Overheating of hydraulic fluid and pump housing.
- Visible external leakage at shaft seal, ports, or housing joints.
- Air bubbles or foam in tank and return lines.
- Increased energy consumption for the same duty cycle.
6.2 Typical Failure Modes
Typical Vane Pump Failure Modes and Possible Causes
Failure Mode |
Main Characteristics |
Likely Root Causes |
|---|
Vane Wear and Chipping |
Rounded vane tips, chips at corners, scoring on sliding surfaces. |
Poor lubrication, high contamination, dry starts, incorrect fluid, cavitation. |
Cam Ring Scoring |
Grooves or scratch marks in cam ring track. |
Hard particle contamination, insufficient filtration, misalignment, low viscosity. |
Rotor Slot Wear |
Excessive clearance between vanes and slots, uneven contact. |
Improper fluid cleanliness, high operating pressure, misaligned shaft. |
Side Plate Erosion |
Wash?out marks near kidney ports, leakage path marks. |
High fluid velocity, cavitation, aeration, incorrect port plate material. |
Shaft Seal Failure |
External leakage around shaft, wet coupling. |
Overpressure, shaft misalignment, excessive case pressure, worn bearings, incorrect seal material. |
Bearing Failure |
Noise, vibration, metal particles in fluid, shaft runout. |
Overloaded shaft, belt drive side loads, contamination, inadequate lubrication. |
Cavitation and Aeration Damage |
Pitted surfaces, spongy or noisy operation. |
Restricted inlet, low reservoir level, high speed, suction filter blockage, air leakage on suction side. |
Thermal Degradation |
Discolored parts, hardened seals, varnish on surfaces. |
Excessive fluid temperature, poor cooling, wrong viscosity, continuous operation at high pressure. |
7. Vane Pump Troubleshooting and Diagnostics
Systematic troubleshooting is the first step of any
vane pump repair and overhaul process. Correct diagnosis prevents
repeated failures and helps define which components must be refurbished or replaced.
7.1 Preliminary Checks
- Verify fluid level, viscosity, and type against design requirements.
- Check filters and strainers for clogging or bypass conditions.
- Inspect suction line for restrictions, collapsed hoses, or air leaks.
- Confirm correct pump rotation direction and drive speed.
- Measure system pressure and flow under rated conditions.
- Check for abnormal vibration or misalignment in the drive coupling.
7.2 Diagnostic Measurements
For more advanced vane pump diagnostics, use:
- Flow meters to determine volumetric efficiency loss.
- Pressure transducers to monitor pressure ripple and instability.
- Case drain measurement to assess internal leakage level.
- Infrared thermometers or thermal cameras to detect local overheating.
- Vibration and noise analysis to identify cavitation, bearing issues, and imbalance.
- Oil analysis for contamination, wear metals, and fluid degradation.
7.3 When to Plan a Full Overhaul
A complete vane pump overhaul is typically recommended when:
- Pump cannot achieve the required flow/pressure even after system adjustments.
- Internal leakage results in more than 20–25% efficiency loss at rated conditions.
- Noise levels remain high after resolving inlet and fluid issues.
- Multiple symptoms (leakage, overheating, unstable pressure) are present simultaneously.
- The pump has run beyond the recommended service interval or shows repeated failures.
8. Vane Pump Repair and Overhaul Process
Effective vane pump repair and overhaul techniques follow a structured,
repeatable process. This ensures consistent quality and reliable post?repair performance.
8.1 Preparation and Safety
- Isolate and lock out all energy sources driving the pump.
- Depressurize the hydraulic system and drain fluid from the pump and lines.
- Clean the exterior of the pump thoroughly to prevent contamination during disassembly.
- Prepare a clean workspace with lint-free wipes, calibrated measuring tools, and parts trays.
- Record the pump identification, nameplate data, and operating conditions for reference.
8.2 Disassembly Procedure
While each model has its own detailed instructions, most vane pump disassembly
follows similar steps:
- Remove the pump from the system, cap or plug all ports to avoid contamination.
- Mark relative positions of end covers, housings, and ports for correct orientation during reassembly.
- Remove shaft key, coupling, and any mounting flanges.
- Loosen and remove tie bolts or body screws in a crisscross pattern to avoid distortion.
- Separate the end cover(s) carefully, avoiding damage to sealing surfaces.
- Extract the cartridge or internal rotor?cam?vane assembly, keeping parts grouped together.
- Remove the cam ring, rotor, vanes, and side plates, noting their orientation.
- Remove bearings, shaft seal, O?rings, and any control components (for variable displacement types).
- Label and store all parts in clean containers to maintain traceability during inspection.
8.3 Cleaning Techniques
Cleaning is a vital step in vane pump repair. Residual dirt or abrasive particles will
accelerate wear after overhaul.
- Use suitable, manufacturer?approved cleaning solvents that do not attack seals or paints.
- Employ soft brushes and lint?free cloths to remove sludge and deposits.
- Use ultrasonic cleaning for heavily contaminated small parts where appropriate.
- Dry parts with filtered compressed air; do not spin bearings with air jets.
- Keep cleaned components covered to protect from airborne contamination.
9. Detailed Inspection and Measurement
Inspection provides the technical basis for deciding which vane pump components can be
reused, which must be reconditioned, and which require replacement.
9.1 Visual Inspection Checklist
- Check vanes for chipping, cracking, discoloration, and uneven wear patterns.
- Examine the cam ring for scoring, pitting, or deformation of the cam profile.
- Inspect the rotor for slot wear, burrs, and out?of?round conditions.
- Check side plates and port plates for erosion, wear tracks, and flatness issues.
- Inspect shaft and housing for fretting, corrosion, and groove marks on seal surfaces.
- Examine bearings for discoloration, flaking, or roughness when rotated by hand.
- Check all seals and O?rings for hardening, cracking, or compression set.
9.2 Dimensional Checks
Use micrometers, bore gauges, and dial indicators to quantify wear. Reference values may
differ, but typical measurement tasks during a vane pump overhaul include:
- Measuring vane thickness and comparing to rotor slot width.
- Checking rotor?to?cam ring radial clearance.
- Measuring end clearances between rotor/cam assembly and side plates.
- Checking cam ring internal diameter for out?of?round and taper.
- Measuring shaft diameter at bearing and seal locations.
- Checking housing bores for ovality and scoring depth.
Indicative Wear Limits for Typical Vane Pump Components
Component |
Typical Check |
Indicative Limit (Example) |
|---|
Vanes |
Difference between vane thickness and rotor slot width |
< 0.02–0.04 mm clearance; above this may cause leakage and noise. |
Cam Ring ID |
Out?of?round and score depth |
Out?of?round < 0.02 mm; scoring depth < 0.01–0.02 mm. |
Side Plates |
Flatness deviation |
< 0.01–0.02 mm across full surface. |
Shaft |
Seal journal wear |
Grooves < 0.05 mm; larger requires repair or replacement. |
Bearings |
Radial play |
Within manufacturer tolerance; any noticeable play typically unacceptable. |
The values above are general examples only. Always refer to specific product documentation
when defining hard acceptance criteria for vane pump repair.
10. Reconditioning and Replacement Techniques
After inspection, each component is either re?used as is, reconditioned, or replaced.
The right choice impacts pump reliability and the overall cost of the
vane pump overhaul.
10.1 Vanes
- Vanes with minor surface polishing but within dimensional limits can often be reused.
- Never attempt to grind vane tips by hand; this disturbs geometry and hardness.
- Replace vanes showing chipping, cracking, or significant corner rounding.
- Always replace vanes as a matched set if supplied that way by the OEM.
10.2 Cam Ring and Rotor
- Light scoring can sometimes be removed by precision lapping to restore surface finish.
- Heavy damage, deep grooves, or loss of hardened layer require replacement.
- Avoid aggressive machining that would increase clearances or change cam profile.
10.3 Side Plates and Port Plates
- Minor distortion can be corrected via surface grinding on precision equipment.
- Maintain strict parallelism and surface finish tolerance after reconditioning.
- Excessive erosion around port windows is usually not repairable and requires new parts.
10.4 Shaft, Bearings, and Seals
- Replace bearings whenever the pump has experienced severe contamination or high operating hours.
- Shaft journals with minor wear may be polished; deeper grooves may need metal spray or replacement.
- Always install new shaft seals, O?rings, and gaskets during vane pump repair.
- Select seal compounds compatible with the operating temperature and fluid type.
10.5 Control and Compensator Components
- Clean and inspect springs, plungers, and control spools for sticking or corrosion.
- Polish small burrs with very fine abrasive paper; avoid dimension changes.
- Ensure all orifices and damping holes are free from blockage.
- Replace damaged or heavily corroded control elements rather than attempting extensive repair.
11. Reassembly of Vane Pumps
Correct reassembly is critical to successful vane pump repair and overhaul.
Contamination control and correct orientation of internal components are particularly
important.
11.1 Assembly Environment
- Use a clean bench with adequate lighting and organized parts layout.
- Wear clean gloves to avoid introducing particles and moisture.
- Lubricate all internal components with clean, filtered hydraulic fluid during assembly.
11.2 Assembly Steps
- Install new bearings on the shaft using correct tools and support surfaces.
- Fit the shaft into the housing, ensuring smooth rotation and correct axial position.
- Install side plates, ensuring correct orientation of port windows and lubrication holes.
- Fit the rotor onto the shaft key or spline, checking for correct seating.
- Insert vanes into rotor slots, observing any chamfer or radius orientation requirements.
- Position the cam ring in relation to the rotor according to design marks or documentation.
- Install any control or compensator mechanisms (for variable displacement pumps) per the schematic.
- Place O?rings and gaskets in their grooves, lightly lubricated to prevent pinching.
- Fit the end cover(s) and tighten body bolts gradually in a cross pattern to specified torque.
- Install the new shaft seal last, protecting the lip from sharp edges using sleeves or tape.
11.3 Assembly Best Practices
- Check that the rotor turns freely by hand without tight spots or binding.
- Confirm that control components move smoothly and return under spring force.
- Record torque values, clearances, and serial numbers as part of the overhaul documentation.
12. Testing and Commissioning After Vane Pump Repair
A thorough test run validates the quality of the vane pump overhaul before
the pump is returned to service.
12.1 Bench Testing
- Mount the pump on a test stand with appropriate drive, reservoir, filters, and instrumentation.
- Fill the pump with clean hydraulic fluid compatible with the application.
- Bleed air from the suction line and case where possible.
- Start the pump at low speed and no load, checking for unusual noise or leakage.
- Gradually increase speed and pressure to rated conditions while monitoring:
- Flow rate and volumetric efficiency versus specification.
- Case drain flow (for condition of internal leakage).
- Noise level and vibration trends.
- External leakage at shaft and housing joints.
12.2 Acceptance Criteria
Acceptance limits may vary, but common criteria for a successfully
repaired vane pump include:
- Flow within 90–100% of nominal at rated pressure and speed.
- Stable pressure without abnormal pulsations or oscillations.
- No visible external leakage throughout the test period.
- Noise level and vibration comparable to reference values for that pump size.
- Fluid temperature within acceptable operating range.
12.3 On?Site Commissioning
- Ensure correct alignment between pump and prime mover using dial or laser tools.
- Use flexible couplings to minimize transmitted misalignment forces.
- Verify correct port connections according to pressure, suction, and drain layout.
- Check relief valve and system safety settings before applying full load.
- Monitor system performance closely during the first hours of operation.
13. Preventive Maintenance for Vane Pumps
Preventive maintenance reduces the frequency and depth of future
vane pump repairs. A well?structured maintenance program focuses on
fluid condition, operating parameters, and early detection of abnormalities.
13.1 Routine Maintenance Tasks
- Check fluid level and top up with correct grade as required.
- Monitor fluid temperature and viscosity; investigate when values exceed design limits.
- Maintain filter elements at recommended differential pressure levels; avoid prolonged bypass.
- Periodically sample fluid for particle count, water content, and additive depletion.
- Inspect suction lines for leaks, damage, and proper support.
- Check for unusual noise or vibration and investigate root causes promptly.
- Inspect for external leakage at seals and connections.
13.2 Condition?Based Monitoring
Advanced installations use condition monitoring techniques to predict
vane pump overhaul needs:
- Online particle counters to detect rising contamination levels.
- Temperature and pressure sensors with trend recording.
- Vibration sensors at pump bearings and housing.
- Acoustic monitoring to detect cavitation or abnormal load conditions.
14. Best Practices in Vane Pump Repair and Overhaul
The following best practices help ensure durable and reliable
vane pump repair results:
- Use only quality replacement parts matching original specifications.
- Maintain cleanliness at every stage of the overhaul process.
- Document disassembly findings to connect failure modes with operating conditions.
- Train technicians on correct handling and measurement of precision components.
- Establish standardized overhaul checklists and test procedures.
- Evaluate system?wide causes such as contamination source, misalignment, and pressure settings, not only the pump.
15. Frequently Asked Questions About Vane Pump Repair and Overhaul
15.1 How often should a vane pump be overhauled?
Overhaul intervals depend on operating hours, pressure levels, fluid cleanliness,
and temperature. In clean industrial environments a major
vane pump overhaul may be needed after 10,000–20,000 operating hours,
while severe mobile applications may require attention sooner. Condition?based indicators
such as increasing noise, temperature, or reduced flow are more reliable than a fixed time.
15.2 Can vane pumps be repaired on site?
Many vane pump repairs, such as seal and cartridge replacement, can be done
on site if cleanliness and tooling are adequate. However, full overhaul including
precision measurement and reconditioning is usually carried out in a workshop environment.
15.3 Should I repair or replace a damaged vane pump?
The decision depends on pump size, severity of damage, availability of replacement parts,
and downtime cost. Large pumps in critical systems are often economically repaired,
while very small pumps with catastrophic damage may be more cost?effective to replace.
A detailed inspection report helps support the decision.
15.4 What are the most critical factors for long vane pump life after overhaul?
Key factors include:
- Proper oil cleanliness and effective filtration.
- Correct operating viscosity and temperature control.
- Accurate shaft alignment and avoidance of side loads.
- Respecting rated pressure and speed limits.
- Careful start?up procedures that avoid dry running.
16. Summary
Vane pump repair and overhaul techniques play a central role in maintaining hydraulic
system reliability. By applying structured disassembly, professional cleaning and
inspection practices, careful reconditioning, and thorough testing, maintenance teams
can restore vane pumps to near?original performance. Combined with proper preventive
maintenance and operating discipline, these techniques significantly extend pump service
life and reduce unexpected downtime.
```


 Phone
Phone
Comment
(0)